
Homemade hummus should be creamy, airy, and deeply flavored – nothing like the gritty, preservative-laden store jars. This version brings the authentic Mediterranean tradition of smooth chickpea and tahini emulsion straight to your kitchen.
During my time working as a restaurant chef in Southern California, I’ve made countless batches of this authentic hummus recipe to be served as part of our highly popular mezze board. I can confidently say it’s a tried-and-true recipe, made with simple ingredients and a few easy chef-tested techniques that makes this the most creamy and tasty hummus.
Whether you’re building dips, boards, sandwiches, or dressings, mastering this basic hummus recipe sets a foundation that elevates every meal.
⭐️ Hummus: recipe at a glance
- Texture & Flavor: Ultra-smooth, luxuriously creamy hummus with balanced flavors.
- Dietary: Vegetarian, vegan, gluten-free, grain-free, and naturally dairy-free. Rich in plant protein, fiber, and healthy fats.
- Quick & Easy: Ready in about 10 minutes with minimal equipment.
- Customizable: Add other flavorings or use it as a base for dips, spreads, bowls, and Mediterranean mezze platters.
- It’s all about technique: We use simple techniques that actually work for restaurant-level smoothness and authentic flavor.
🔎 Ingredients, Substitutions and Swaps
For the complete list of ingredients and exact quantities, check the printable recipe card below.
- Canned Chickpeas: Aka garbanzo beans. Convenient and accessible; removing the skins before blending dramatically improves creaminess. This process is easier than you think.
- Tahini: A powerhouse of flavor. A bit nutty and somewhat bitter, purchase good-quality tahini containing one single ingredient: mechanically hulled sesame seeds. Make sure you stir it well, before using it.
- Lemon Juice: Bright acidity that balances the richness of the other ingredients. The flavor of fresh lemon is unequivocally better than bottled juice.
- Garlic: For the best tasting hummus, use fresh garlic cloves. Roasted garlic is also a good idea for a complete different flavor profile.
- Ice Cubes: Keeps the ingredients cool when blending and adds aeration, helping turn dense beans into scoop-worthy cloud-like hummus. I learned this trick from Refika’s Kitchen.
- Olive Oil: Use good quality extra virgin olive oil.
- Salt: I use sea salt or Kosher salt.

🔎 How to Make Hummus?
Scroll down to the printable recipe card for detail instructions.
- Prepare the Chickpeas: Drain the chickpeas and rinse them briefly under cold water. For super smooth hummus, peel the skins by gently rubbing them under water until the skins float and can be removed.

- Process/Blend: Blend the Base: In a food processor, combine the peeled chickpeas, tahini, lemon juice, garlic, olive oil, and salt. Process for about 40 seconds, scraping down the bowl as needed.


- Process until Smooth: Add an ice cube, then blend at high speed for about 3-5 minutes, adding additional ice cubes every 50-60 seconds. This cools and adds air to the mixture for a lighter, fluffier texture than traditional blending alone. Once blended, adjust the seasoning to taste. Transfer to a serving bowl, and serve.
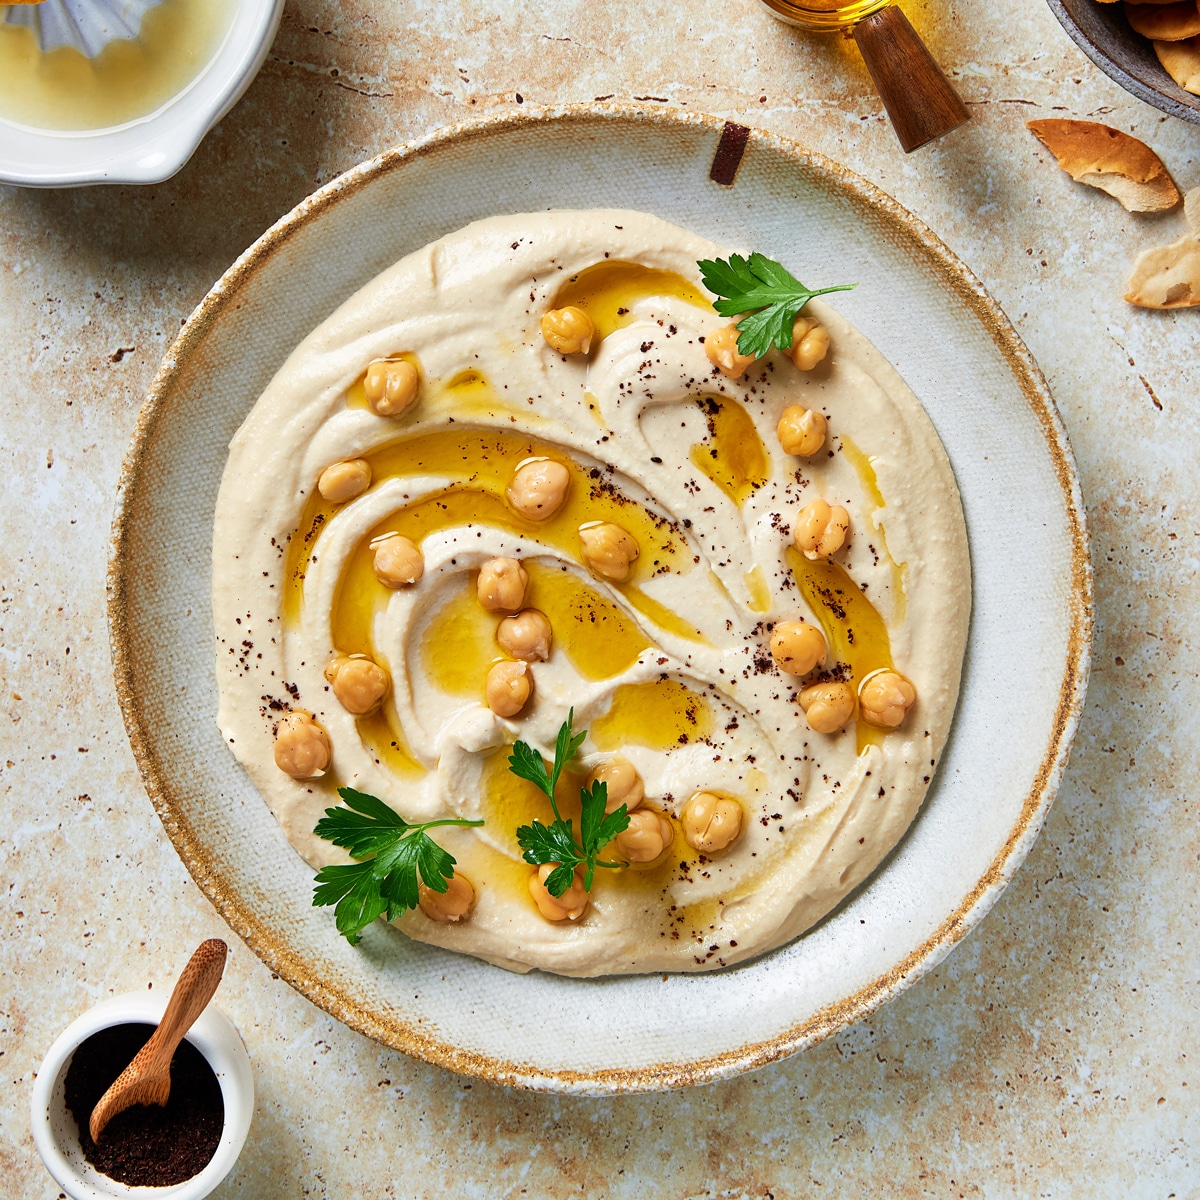
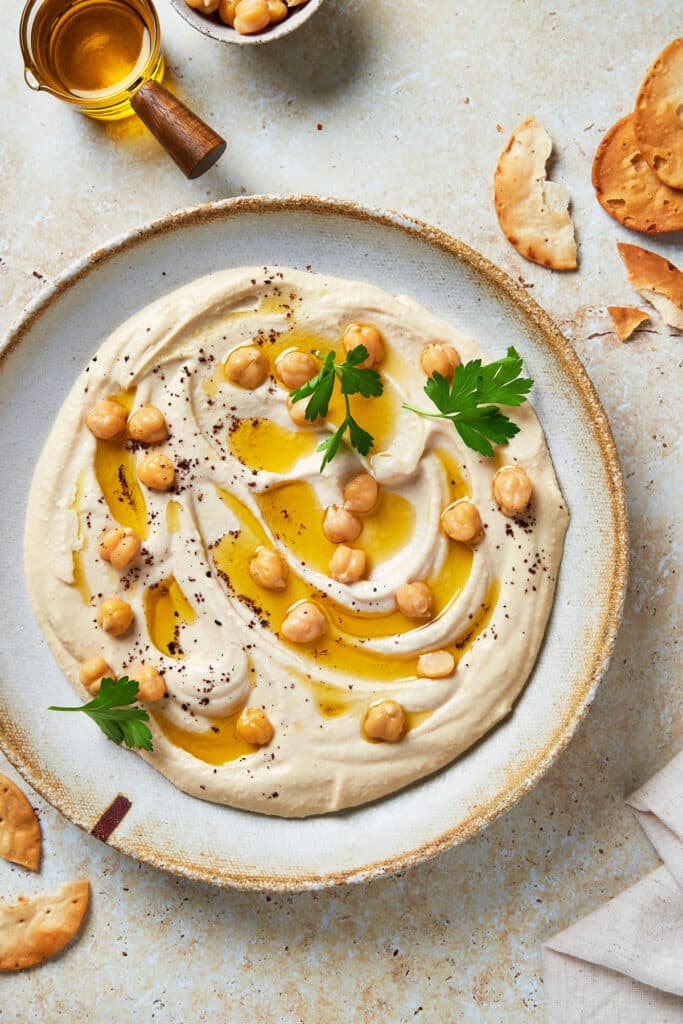
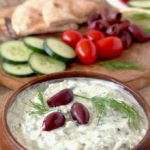
- Optional but Recommended: Let the hummus rest in the fridge for about 30 minutes to meld flavors. Before serving, create a shallow well, drizzle with olive oil, and garnish with toppings like ground cumin, sumac, parsley, or whole chickpeas.

🔪 Recipe Tips: For next lever hummus
- Ice water aeration: Adding ice during blending is a chef hack for ultra-creamy texture – once blended like this, store versions feel flat and grainy.
- Quality tahini matters: Tahini brands differ significantly; a good one makes a noticeable difference in flavor and mouthfeel.
- Removing the skin of canned chickpeas: Although I’ve been removing the skins simply with water, not long ago I learned a trick from my friend Yumma from Feel Good Foodie. She soaks one (15-ounces can) of chickpeas in a solution of warm water and 1.5 teaspoons of baking soda for about 5 minutes before rubbing the skins off!
- Reserve the Aquafaba: Aquafaba (the water in canned chickpeas) can be used for many preparations. Store it in the fridge for about 4 days.
Frequently Asked Questions
What are the main ingredients of hummus?
Chickpeas or garbanzo beans, tahini, fresh lemon juice, garlic cloves, extra virgin olive oil and salt.
What can be used instead of tahini in hummus?
Unfortunately, tahini is a key ingredient when making authentic hummus. Tahini paste is made with sesame seeds and is available at most grocery stores. Sunflower seed and nut butters such as almond butter can be used instead but the flavor won’t be the same as when using tahini.
What is the secret to create the smoothest hummus?
For the creamiest and fluffiest homemade hummus make sure you peel the chickpeas first then, blend the hummus for 5 full minutes, adding an ice cube to the mixture every 50-60 seconds.
Can I make hummus with dried chickpeas?
Absolutely! Cooking your own dried chickpeas often yields a richer flavor and is easier on the budget. Canned chickpeas are used for speed and convenience.
Can I make hummus without a food processor?
Yes! A high-power blender works well. Hand mashing is possible requires great effort to achieve a smooth consistency.
Why add ice cubes?
Ice chills the mixture and creates tiny air pockets, leading to a smoother, fluffier texture that mimics restaurant-style hummus.
🔎 How to Serve Hummus?
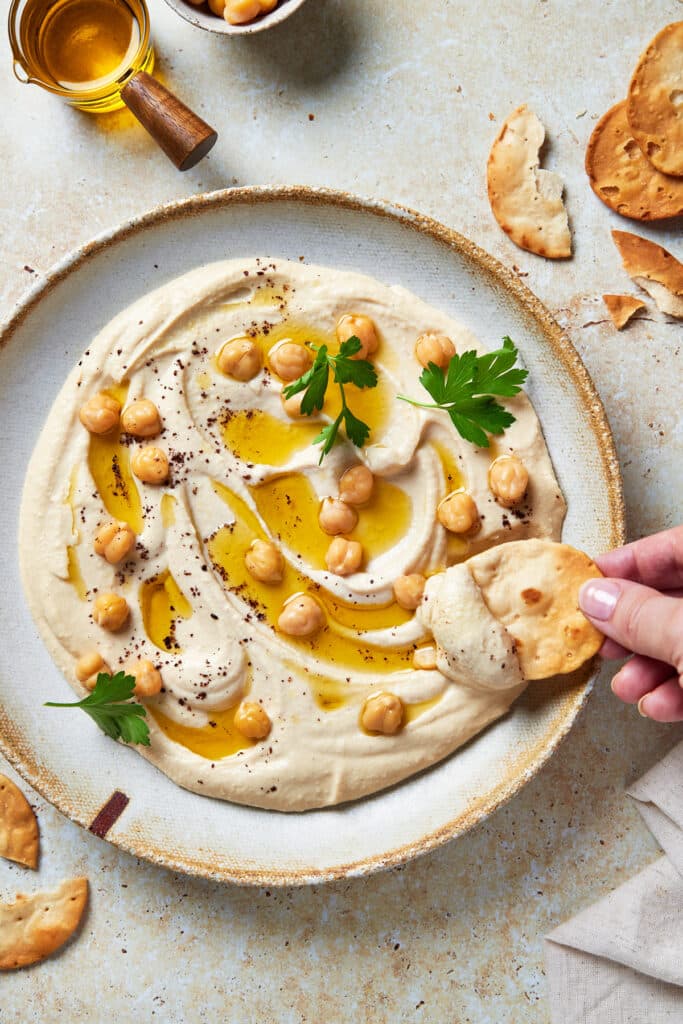
- Mediterranean countries serve hummus with pita bread. As an appetizer or snack, it can be also be served with veggies, pita chips, crackers or Flatbread.
- Hummus is also served as part of a traditional mezze platter alongside other small plates such as Baba Ganoush, Tzatziki, roasted vegetables and olives.
- Add a dollop into grain bowls, or use it as a spread for sandwiches and wraps like in this Chicken Shawarma wrap. Pair it with grilled veggies, falafel, or even proteins like chicken or tofu for balanced meals.
💛 Conscious Bites
Your priorities, your recipe. Learn about Intentional Cooking.
Finances: Hummus is one of the most budget-friendly dishes you can make at home. With pantry staples like dried or canned chickpeas, tahini, and lemon, a generous batch costs far less than store-bought versions and stretches easily across multiple meals.
Environment: Chickpeas are a low-impact crop that requires less water than many animal-based protein sources. Making hummus at home reduces packaging waste and supports a more plant-forward way of eating with a lighter environmental footprint.
Health and Healing: Rich in fiber, plant-based protein, and heart-healthy fats, hummus supports steady energy, digestion, and overall wellness. Its simple, whole-food ingredients make it a nourishing choice that satisfies without heaviness.
🔎 Make-Ahead, Storing and Freezing
- Making-Ahead: Hummus tastes even better a day after making and safely stores up to a week in an airtight container.
- Storage: Store leftover hummus in an airtight container in the refrigerator for about a week.
- Freezing: Hummus freezes well for up to 3 months, stored in an airtight container. Thaw in the fridge overnight and stir well.

👀 Take a look at these other appetizer recipes:


🛒 Essentials you’ll adore for this recipe
-

Food Processor
This reliable and powerful kitchen tool chops, shreds, purées and mixes dough like a champ! It has 4 convenient settings and 12-cup capacity. It’s also dishwasher safe which is always a nice feature.
-

Citrus Juicer – Squeezer
A sturdy, no-frills kitchen essential that extracts maximum juice from lemons and limes while keeping seeds out. Easy to use, easy to clean, and perfect for dressings, marinades, cocktails, and everyday cooking when fresh citrus flavor matters.


The Best Homemade Hummus
Ingredients
- 1 (15-ounces) can chickpeas, (400 grams)
- 6 tablespoons tahini
- Juice of 1 large lemon, (about 2 tablespoons , plus more if needed)
- 2 garlic cloves
- 1/2 teaspoon salt, or more to taste
- 2 tablespoons extra virgin olive oil
- Ice cubes, about 6 – one for each minute you process the hummus
Garnishes – pick 2-3: (optional)
- Good quality extra virgin olive oil
- Whole chickpeas
- Ground cumin
- Paprika
- Chopped parsley
- Ground sumac
- Toasted pine nuts
Instructions
- Drain the chickpeas and give them a quick rinse. For easy peeling, place the chickpeas in a bowl with enough cold tap water to cover them by at least 2 inches. Gently rub the chickpeas between your fingers. This helps in removing their skin which will start to float to the top, leaving the chickpeas at the bottom of the bowl. Start draining the water, removing the skins as you go. Discard the skins (or compost) Repeat this process once again to make sure all the chickpeas are peeled.
- Place the peeled chickpeas, tahini, lemon juice, garlic, salt and olive oil in the bowl of a food processor. Process for about 40 seconds. Scrape down the sides and bottom of the bowl with a spatula, then process at high speed for about 3 minutes, adding one cube of ice every 50-60 seconds to keep the mixture cold. Taste and adjust seasonings to your taste with additional tahini, lemon and/or salt.
- Transfer to a bowl and cover with plastic wrap making sure the wrap touches the surface of the hummus. This will prevent a skin from forming. Refrigerate for 30 minutes to 4 hours so the flavors develop and meld together.
- When ready to serve, make a small crater with the back of a spoon and drizzle with olive oil. Garnish and serve with pita bread or pita chips and/or veggies.
Notes
- Adding ice cubes to the mixture while processing produces the most luxurious, creamiest and fluffiest hummus ever!
- Blend/process the hummus for 5 full minutes, adding ice cubes every 50-60 seconds. This guarantees smoothness and creaminess.
- Using good quality ingredients is a must when making Lebanese hummus.
- Making-Ahead: Hummus tastes even better when made a day ahead and will keep in the refrigerator, in an airtight container for a week.
- Storing: Store leftover hummus in an airtight container in the refrigerator for about a week.
- Freezing: Hummus freezes well for up to 3 months, stored in an airtight container.
- Technique adapted from Refika’s Kitchen.


Leave a Reply